Sunday morning, fresh coffee, fresh hot sausage and eggs for breakfast. Sounds wonderful, right? With a little planning, you can make it yourself. And I mean REALLY make it yourself. No preservatives, no high package prices. I’ve already talked in my blog about making Italian sausage, but now it’s time for breakfast sausage. My family can never get enough of this. They’d eat it everyday if I made it possible. When I was buying pre-packaged sausage, the price was crazy, so we’d only get small portions and everyone was left with wanting more, plus they left a lot of grease in the pan and shrank down a lot when they cooked. With homemade sausage, you’re controlling the fat content, so the portions will be more meaty, less greasy, and retain their size.
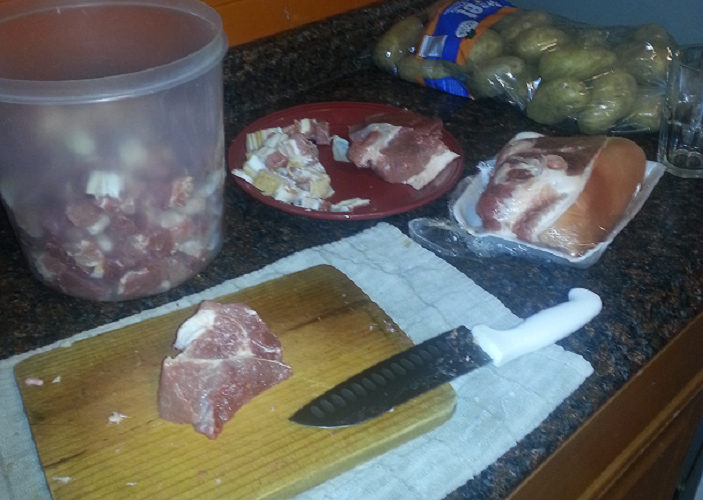
As I discussed in my other sausage post, you can make sausage out of any meat. My preference is pork. Recently pork loin roast went on a great sale of $1.99 a pound and they were sold as large loins about 5 pounds each. This is a nice quality lean meat, almost no fat. So in order to make this into sausage you absolutely have to add fat. I added about 1/2 pound of chopped frozen raw bacon. My loin roast was boneless, so cutting it into small cubes was a breeze.
Meat is easier to cut when its very cold, so keep your meat refrigerated until right when you want to cut it. The colder the better, But frozen will be too hard for you get your knife through. To better handle the meat, I wear a normal knit winter glove covered in a disposable vinyl glove (the kind you see people wear who prepare food at restaurants or delis). Cut up all your meat and mix the bacon pieces in as you cut. Return the cut meat to the fridge for a while. Let it get good and cold again. While it’s getting cold you can make your spice blend. Also chill plain water, the colder the better. Chill a cup of water, you’ll only use probably 3/4 of a cup. Once the meat is cold again, use a grinder to grind the meat into a fine grind. My grinder attachment for my Kitchen-Aid came with two plates, a larger hole plate for coarse grind and a smaller hole plate for fine grind. I prefer the find grind for my sausage because it makes it easier to shape and keep its form. Once all the meat has been ground, its time to add the spices. I’ve looked at many recipes and tested repeatedly. This is my personal blend. You can run with it if you like, or you can adjust to fit your own tastes.
Carol’s Homemade Breakfast Sausage
- Approximately 5 pounds ground pork (including fat)
- 3/4 – 1 cup ice cold water
- 5 tsp. sea salt
- 3 tsp. ground black pepper
- 4 tsp. ground sage
- 1 1/2 tsp. ground nutmeg
- 1 1/2 tsp. red pepper flakes
- 3 tsp. dried thyme
- 1 tsp. cayenne pepper
- 3 Tbsp. packed brown sugar
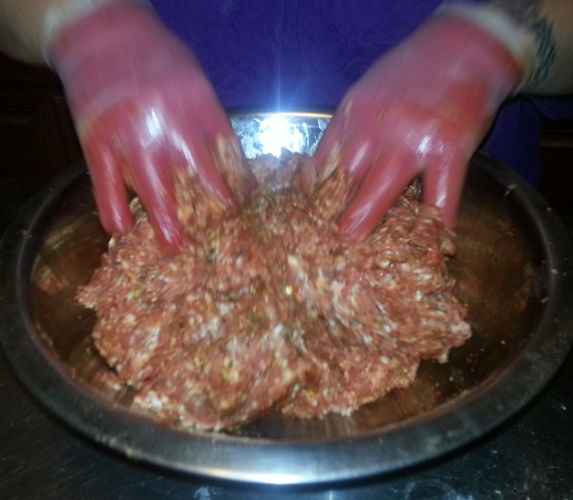
In a large mixing bowl, pour spices over meat, Add 3/4 cup water and mix well, getting spices well incorporated. If the meat feels a little dry, you can add the remaining water. It’s better to add too little water than too much. Don’t skip the liquid. Even if it seems like you don’t need it, the meat will absorb the liquid and help keep it moist while it cooks. If you skip the liquid because you think you don’t need it, when its time to cook your sausage it will be hard and dry and the taste won’t be as good. After blending, let the meat sit in the fridge for at least an hour. Overnight is okay too. To check your flavor, take a small amount and form it into a patty. Fry it up and try it. If you need to make any flavor adjustments, do it now and let the meat sit for an hour and try again.
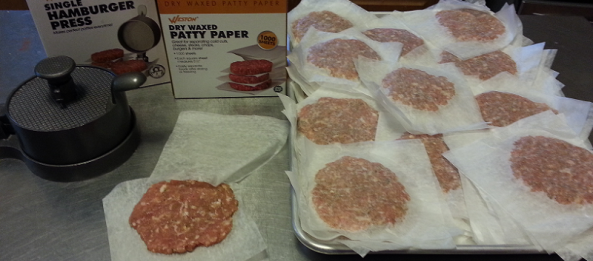
When you’re happy with your sausage, it’s time to divide it up. Some can be portioned off into one pound amounts and frozen for times when you want to make biscuits and gravy or other dishes. You can form the rest into patties. I use to make all mine by hand, but they were never uniform. They’d be lop-sided or too thick in the middle. I invested in a hamburger press for about $25. Absolutely worth it! It’s solid metal, made by Weston, and adjustable so I can make patties any thickness I want. It’s also a great investment to buy “patty papers” to keep your meat from sticking to the press. They also work great for freezing as they keep the meat separate and easy to handle when frozen.
So this batch, I decided to make all patties. I got out my kitchen scale (another great investment – cost $10 at Aldi and I use it all the time!) and measured the meat into 2 ounce balls. Each ball was pressed between two squares of patty paper. You can cut your own squares of parchment paper if you like. The patties were stacked on a tray and placed into the freezer. This batch I got 47 patties @ 2 oz. each. and it cost me roughly $12. That’s about $0.25 per patty. Most store packages give you 8 – 1 ounce patties in a box and charge you anywhere from $1.50 to $3.50 a box.
Once frozen I place in gallon zipper bags labeled and dated. Because of the paper, I can take out one or ten, without hassle. Peel off the paper and fry from frozen. Or, if you like (I have done this too) fry the patties while meat is fresh. If you manage to have any left when you’ve cooked it all (my family ate them as fast as I could cook them), the cooked patties can be frozen and microwaved later for a quick on the go breakfast or for kids who you’d rather operate a microwave than a frying pan and hot stove. Just be sure to label the freezer bags as to whether the patties are raw or cooked. ENJOY!